The Mode Control Panel - MCP
When used with a simulator the MCP displays the AP values in use and allows the user to change them.
When used with Device Location Services the MCP allows the setting of a virtual auto-pilot system which naturally doesn't do much but which allows things such as the course direction to be rotated on the MFD or the source to be selected for ILS and VOR navigation.
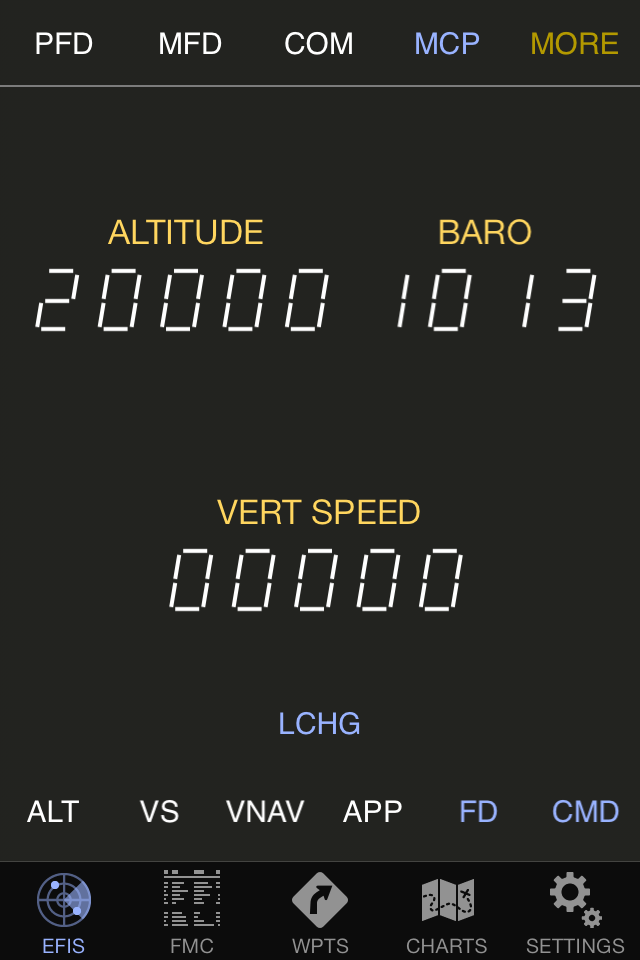
On the iPhone the MCP comprises two distinc pages, one for lateral navigation and one for vertical navigation which can be toggled using the MORE option. On the iPad these are presented in the same screen/page.
Dialers
Tapping in each of the numbers brings up a dial-pad style keyboard allowing the corresponding value to be changed.There are dialers to change the auto-pilot altitude, speed hold in IAS or MACH, heading hold, vertical speed, course/obs 1 and 2. There is an additional dialer for the barometric pressure setting which is not related to the MCP but that in the absense of a better place can be controlled from there.

Status Buttons
Much like on a real MCP, the status buttons allow the change of auto-pilot engaged statuses. Some of these have only two states, ON (green or blue) and OFF (white) and the others have threee states, OFF, ON and ARMED (orange). When pressed the buttons attempt to toggle the state.The buttons have the following effect when pressed:
The AP source
The last button is the source button which allows toggling between NAV1, NAV2 and FMC modes. On the iPhone and iPod this button can be found between the LNAV and FD buttons on the lateral navigation page.
NAV1 and NAV2 modes make AirTrack work based on the navaids tuned into the NAV radios.
As an example, lets say you were doing an ILS approach to KBOS RW 15R. You would select NAV1 as the source in the MCP and tune 110.70Mhz in the NAV1 radio. You would then dial 151 into COURSE 1, put yourself into position for capturing and press LOC and APP to arm.
At this point if you go back to the MFD and select approach mode you will see the ILS needles ready to guide you. If you check the PFD you will see the statuses of the LOC and GS captures.
The same applies for NAV2, only that the NAV2 radio and COURSE 2 are used instead.
Both NAV1 and NAV2 modes are also avaible for VOR navigation.
The last mode, FMC, uses it as the data source so it must be selected to engage the LNAV and VNAV modes.
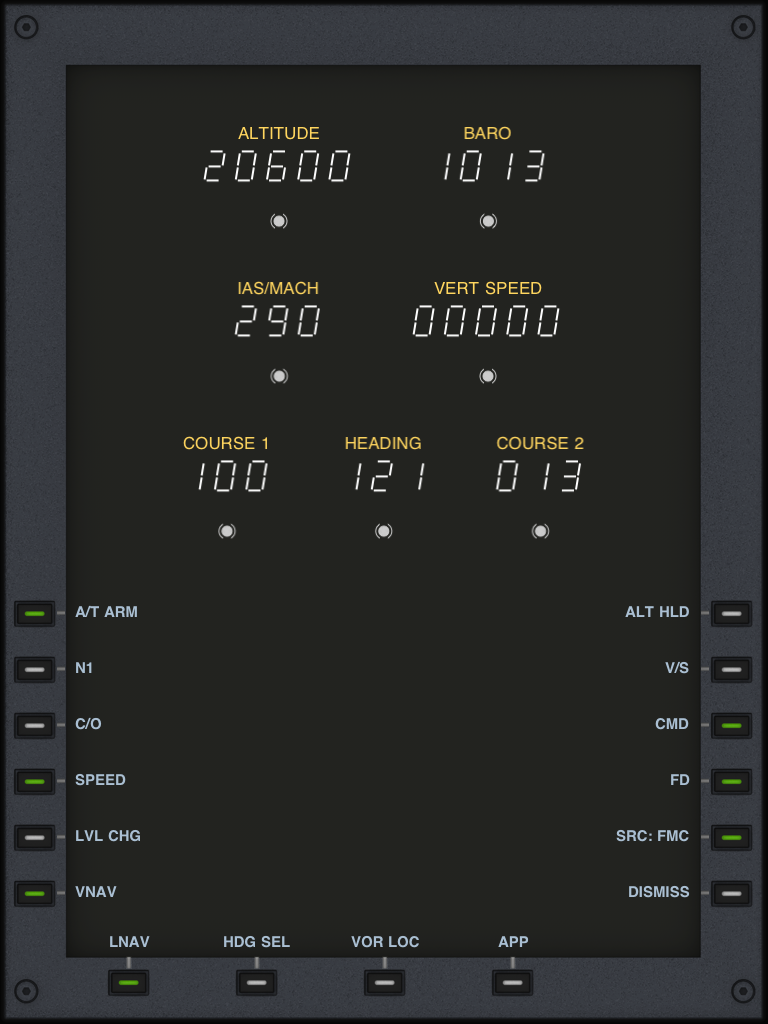
On the iPad
Since the iPad is big enough to show everything, the entire MCP is displayed in one page on this device. The following picture illustrates it.